
Build and Kill Zombies Car Builds Tier List
Three archetypes, one Save slot each, and which one to Drive when the boss clock is red.
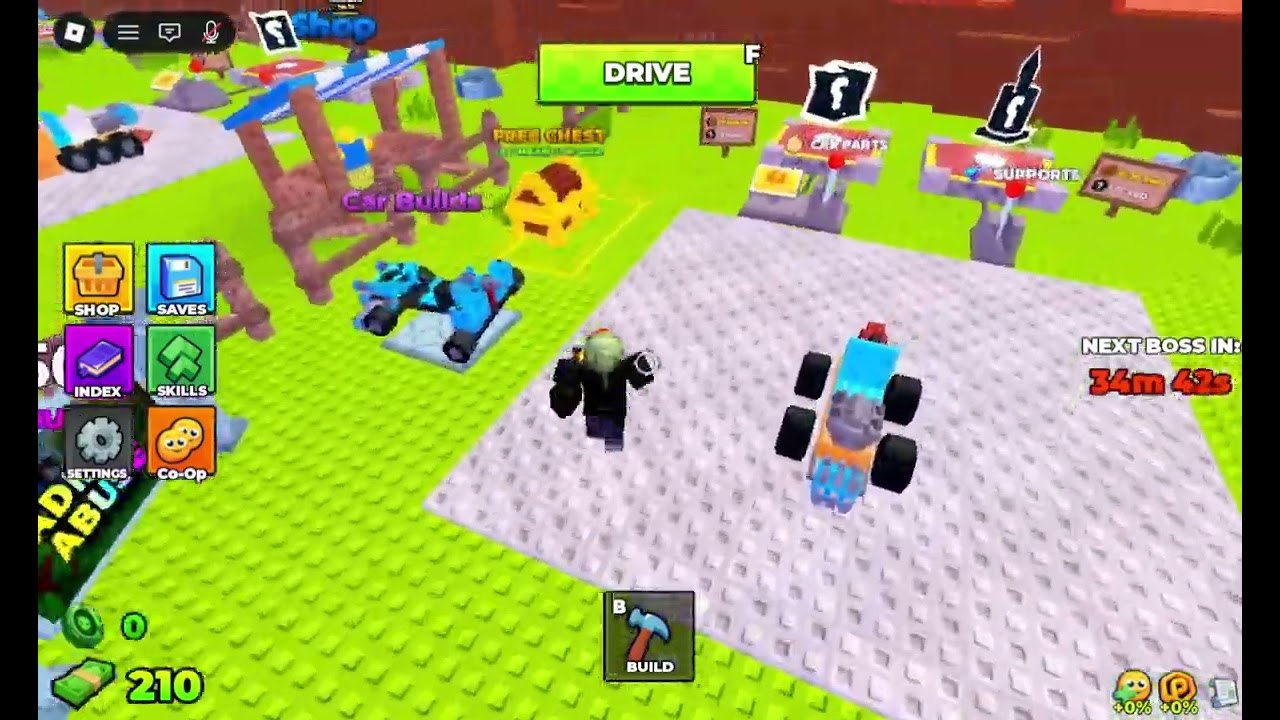
A build in Build and Kill Zombies is a saved kart with a job. The lobby already shows multiple colored buggies on the same pad — that is the end state. This list ranks three archetypes that match the live HUD: spike roller, wide bumper, and speed needle. Copy one, Save it, and only then start mixing.
For part-level ranks see weapons. For placement steps see how to build a car. For a checkbox version use the build planner.
S — Spike roller (thumbnail meta)
Goal: look like the official art and delete clusters.
- Four to six wheels, low chassis.
- Purple or any heavy body brick behind a grey spiked cylinder.
- Seat centered, slightly back.
- Turbo once the nose exists.
- Skills that trigger on contact.
When: solo farm, King 1x1x1x1, any time zombies bunch past the checkered strip.
Fail state: roller mounted too high, or extra stories that flip the kart. Keep it squat.
A — Wide bumper (co-op truck)
Goal: not pop when friends ram you.
- Flat brick wall wider than the seat.
- Extra wheels for the extra mass.
- No tall decorations.
- Skills that add HP or ram resist if the tree offers them.
When: full five-player servers, Admin Abuse chaos, learning Drive on mobile.
Fail state: wall so wide you cannot cross the checkered strip without snagging the Car Builder stall. Measure on the pad first.
B — Speed needle (Distance hunter)
Goal: leave 10 studs/s behind and farm cash on long grass.
- Minimal nose (still a nose).
- Max wheels and turbo.
- Thin body.
- Skills that add speed.
When: empty servers, post-boss downtime, showing off Distance. Not when NEXT BOSS IN is under ten minutes unless you already have the King badge.
Fail state: you bought speed before armor and the first walker deletes the seat.
C — Starter buggy (everyone’s first Save)
Four wheels, red brick, cyan seat, no plow. Fine for the tutorial ram. Replace it after the group chest. Do not take it into a Hacker Event.
D — Tall trophy / Index flex
Second stories, hanging toys, unarmored seats. Funny in Saves. Fatal on the grass. Park it as a museum Save and Drive the roller.
How to swap mid-session
Saves is the second left-stack tile. Keep at least two snapshots: a farm bumper and a boss roller. Swap before the clock hits five minutes. Do not rebuild from scratch during Admin Abuse — the board will not wait.
Co-op tip: if two friends copy the same S-tier roller they will compete for the same zombies. Run one roller and one bumper in a pair. Online co-op is the point of the five-player cap; use mixed roles.
Revisit this list after Car Parts patches. A new roller variant can collapse A into S. A mass nerf can resurrect the bumper. Watch updates rather than copying a month-old screenshot.
Mixing two Saves in one session
Farm on the bumper for twenty minutes while NEXT BOSS IN is fat. Swap to the roller at fifteen minutes. If you only keep one Save, you will either farm too scared or fight too pretty. The Saves tile is the second icon; using it is cheaper than a 50K pack. Name the snapshots in your head (farm / boss) even if the UI only shows slots. After Admin Abuse, duplicate the farm Save before you meme-build — Abuse is how trophy stacks get screenshots and how boss Saves get overwritten.
Frequently Asked Questions
Quick answers for lobby, Drive, codes, and boss timers.
Which build should I make first?
A squat spike roller if you play mostly solo. A wide bumper if you Drive with friends.
How many Saves should I keep?
At least two: a farm layout and a boss layout. The Saves tile is cheap insurance.
Is the starter kart ever good?
Only for the first Drive. Replace it after codes and the group chest.